Setting up Salesforce Lightning
mCommons offers an enhanced Salesforce integration that supports Salesforce Lightning. This integration matches the core functionality of the existing Classic integration, while introducing support for the Lightning interface.
Note: The new Salesforce Lightning integration is backward compatible and continues to support mCommonscustomers using Salesforce Classic.
This integration ensures mCommons customers can continue using their Salesforce CRM—regardless of version—without compromising on data accuracy or functionality.
You must have Administrator access to work with data syncs in mCommons. To initially enable the sync, please contact your Customer Success Manager (CSM) or reach out to Technical Support.
The mCommons and Salesforce Lightning integration includes:
-
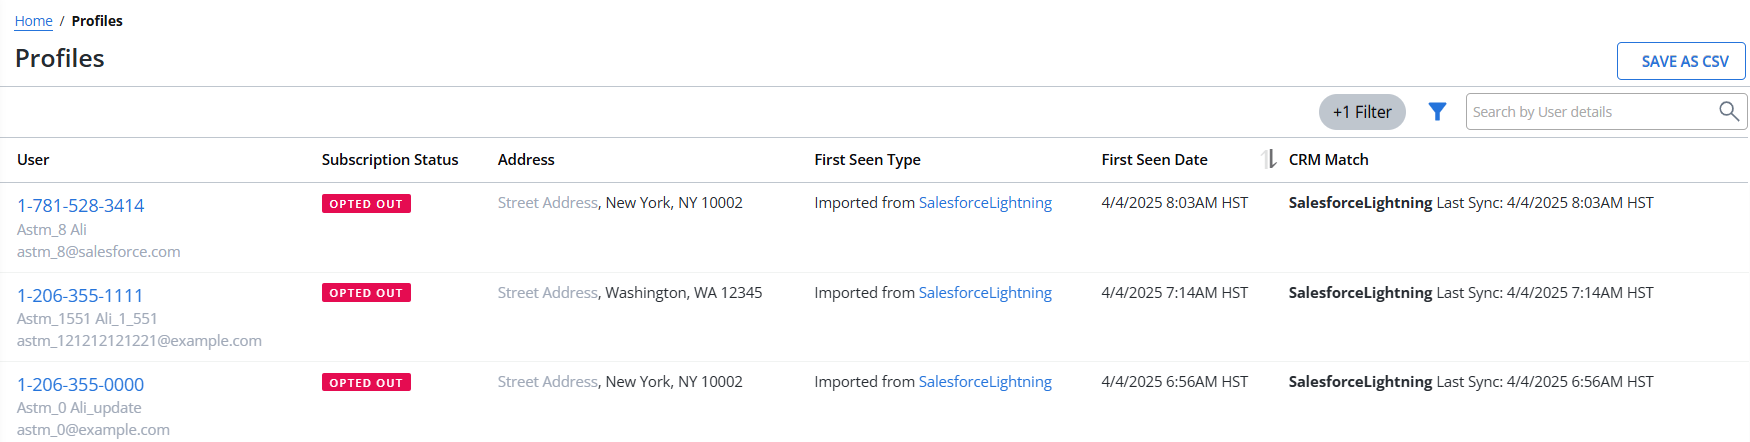
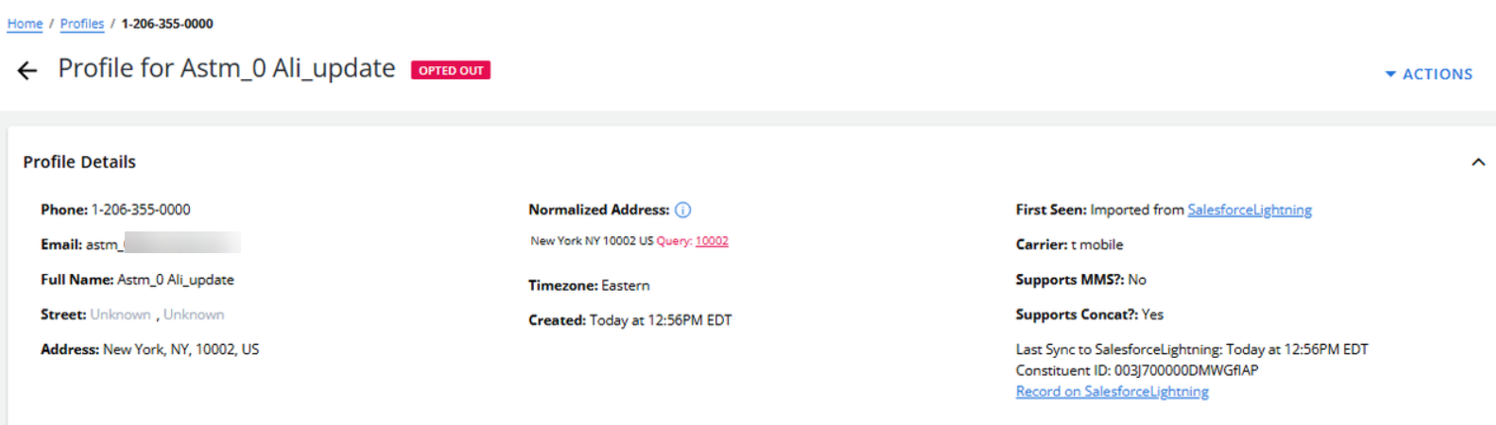
Bi-directional syncing for user records (profiles). Daily syncing of new profiles daily between mCommons and Salesforce Lightning to keep data updated in both systems.
-
Syncing donation data twice a day.

Note: Donation data syncs one-way from Salesforce Lightning to mCommons.
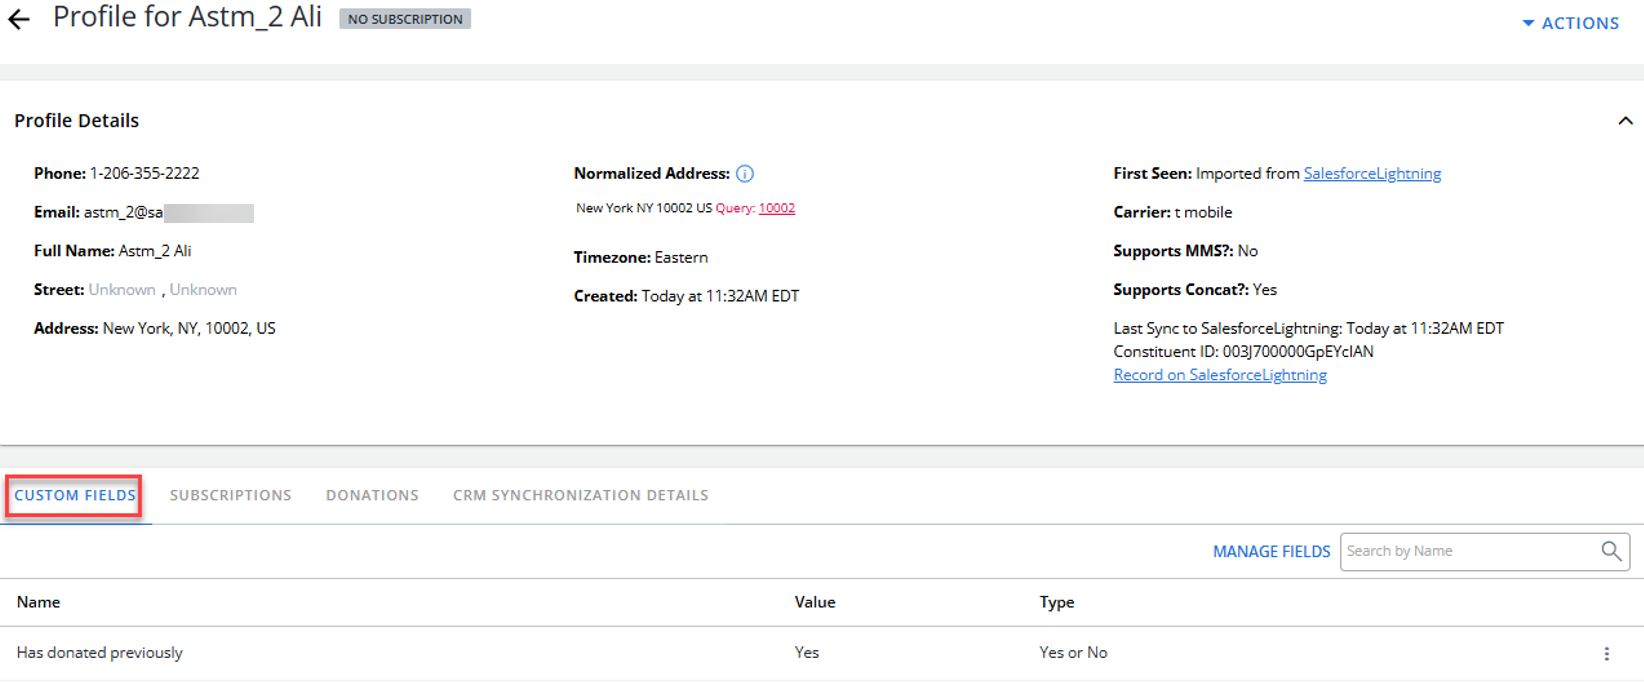
If a profile includes donation records, a custom field named "has_donated_previously" is created in mCommons with the value “true”.
The user records must include a mobile number. To set up the Salesforce Lightning data sync:
Preparing for setup
Before you begin, gather the log-in credentials and set up any other key connection settings for your Salesforce Lightning CRM system.
-
In mCommons, create or designate a web opt-in path, which will serve as the default opt-in path for any new users pulled from the Salesforce Lightning data set. For more information, see Adding a new web opt-in path.
New subscribers will receive the Welcome message associated with the selected opt-in path. For more information, see Data sync paths.
Tip: Work with your mobile strategist to organize your synced subscribers by mapping specific Salesforce groups to different opt-in paths.
-
In Salesforce, set up a custom Boolean (true/false) mobile opt-in field named Mobile_Subscriber_c (case sensitive) for use with a custom export. For more information, see Setting up a custom export section below.
-
Make a note of the following credentials from your Salesforce system:
-
Existing Salesforce login or API username and password.
-
Tip: Create a new set of credentials exclusively for use with mCommons (recommended).
API security token. To generate a security token, go to salesforce.com.
API host name, which is usually the URL of your Salesforce account. Be sure to leave off the http:// or https:// at the beginning of the URL. It is automatically added in the API call and may cause sync errors.
Full URL for the Salesforce custom export, which should end in "=CSV". For more information, see “Setting up a custom export” section below.
Setting up a custom export
In order to sync user opt-ins and out-outs, set up a custom export URL in Salesforce. Without it, mCommons cannot sync updated records with a mobile phone field.
When setting up your custom export:
-
Add a Contact ID column containing the Salesforce ID for the contact.
-
Confirm that the export URL is set up to export as a CSV from Salesforce. The URL should end in "=CSV".
-
Make a note of the custom export URL, so you can add it to the Salesforce configuration.
-
(Recommended) Set up a custom report in Salesforce that provides the Constituent ID, which identifies synced reports across both systems. This report also helps to minimize the number of API calls, so you are less likely to exceed the daily API quota limit.
Configuring the Salesforce Lightning integration
To sync data between your Salesforce Lightning database and mCommons:
-
Select Home in the left pane, and then select Data Sync.
-
Select Salesforce Lightning.
The home page for Salesforce Lightning sync opens.
-
In the Integration Actions panel on the right, select Configure Integration.

The Salesforce Lightning configuration form opens.
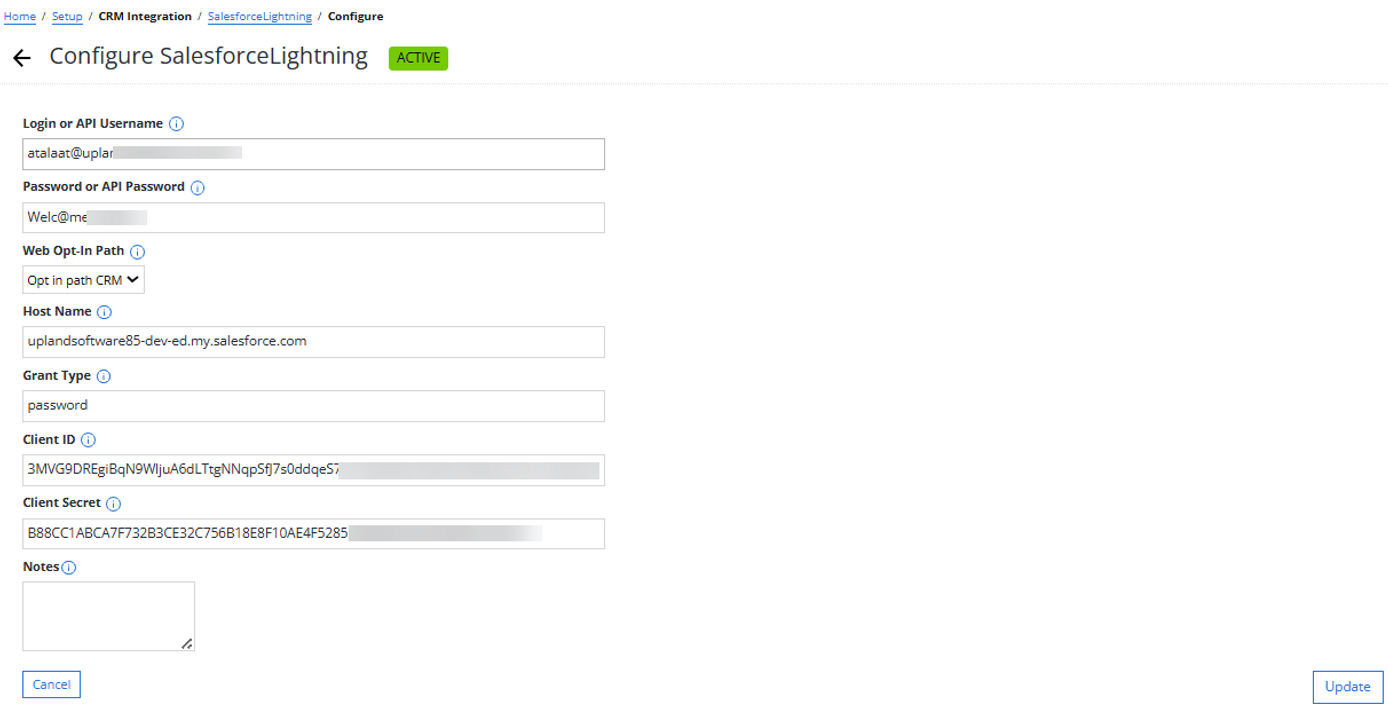
For assistance, select tooltip available next to the field label.
The Salesforce Lightning integration requires OAuth 2.0 credentials. You will need to provide:
-
Host Name (your Salesforce subdomain, e.g., yourcompany.salesforce.com)
-
Grant Type (typically password for server-to-server authentication)
-
Client ID (from your Salesforce Connected App)
-
Client Secret (from your Salesforce Connected App)
-
Username (your Salesforce Lightning username)
-
Password (your Salesforce Lightning password)
The integration uses OAuth 2.0 to authenticate and obtain access tokens. You will need to create a Connected App in Salesforce to obtain the Client ID and Client Secret.
-
In the Login or API Username field, enter your username for your Salesforce Lightning system, and then enter your password in the Password or API Password field.
-
Web Opt-In Path: If you want new records coming from Salesforce Lightning to subscribe to a specific campaign, select a web opt-in path from the dropdown menu. If you do not select a web opt-in path, new records from Salesforce Lightning will remain unsubscribed in mCommons.
-
Enter the host name for API requests.
-
Enter the grant type. Salesforce grant type to generate security token for the salesforce account. This can be generated through salesforce.com.
-
Enter the client ID and client secret.
-
(Optional) Enter your notes for internal use only.
-
When you are done, select Update.
Reviewing required and supported fields
The Salesforce Lightning data sync supports all standard and custom profile fields. After you configure your Salesforce Lightning integration with mCommons, review your Salesforce Lightning system and mCommons user records (profiles) to ensure required and supported fields are available in both data sets.
The following fields are required:
-
Phone number
-
Email
Note: To update default attribute values from mCommons to Salesforce Lightning, the email field in mCommons must be updated as part of the sync. If the email is not updated, attribute values will not update in Salesforce Lightning. Be sure to include the email field in your sync to ensure changes are properly applied.
-
Opt-in status (for Conservative syncs)
Supported Fields
| Category | Field | Default field name |
|---|---|---|
| Subscription status |
Opt-in (required for Conservative syncs) |
"opt_in_status" |
| Demographic |
Phone number (required) |
"phone_number" |
| First name | "profile_first_name" | |
| Last name | "profile_last_name" | |
| Email (required) | "profile_email" | |
| Address/Location | Street address | "address_street_1" |
| Street address 2 | "address_street_2" | |
| City | "address_city" | |
| State | "state" | |
| Zip Code | "address_postal_code" | |
| Country | "address_country" | |
| Other | Constituent ID | The field names differ by data set: • "constituent id" (mCommons) • "id" (Salesforce) |
Note: To update default attribute values from Salesforce Lightning to mCommons, the corresponding fields must be empty in mCommons.
If you are not using the default field names, use custom field mappings to specify field names in Salesforce Lightning.
To set up custom field mappings:
-
Select
 Home in the left pane, and then select Data Sync.
The home page for Salesforce Lightning sync opens.
-
In the Integration Actions panel on the right, select Edit Field Mappings. This form lets you map from mCommons fields to Salesforce Lightning fields. These fields MUST match the variable names in the API/data export.
Hover the
 Question Mark icon available next to “Data Sync” to view the tooltip text.
It has a tabbed interface that separates standard and custom fields, so that you can map and manage required fields and custom fields easily in a more intuitive and structured way.
The "Field Mappings" page has the following tabs:
-
Field mapping (default tab)
-
Custom field
You can easily switch between tabs to view and manage standard or custom fields respectively.
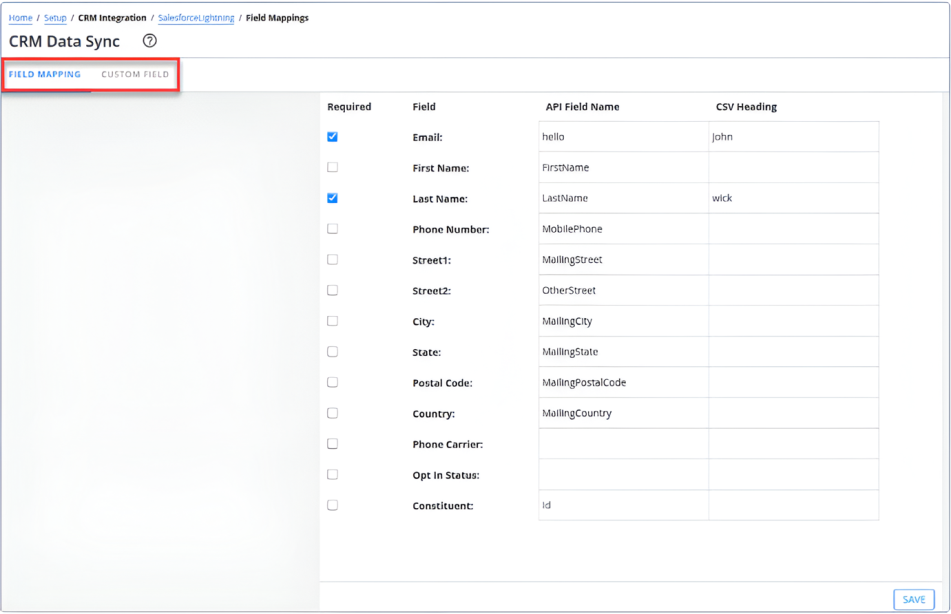
Field Mapping:
In the FIELD MAPPING tab, you will see a table where you can manage your standard field mappings.
The table includes checkboxes to mark fields as required, a Field label displaying field name, a column showing mapped API field values (with a label titled “API Field Name”), and a CSV Heading column for the corresponding CSV headers.
This layout helps you clearly match your CSV fields with the correct API fields and identify required fields with ease.
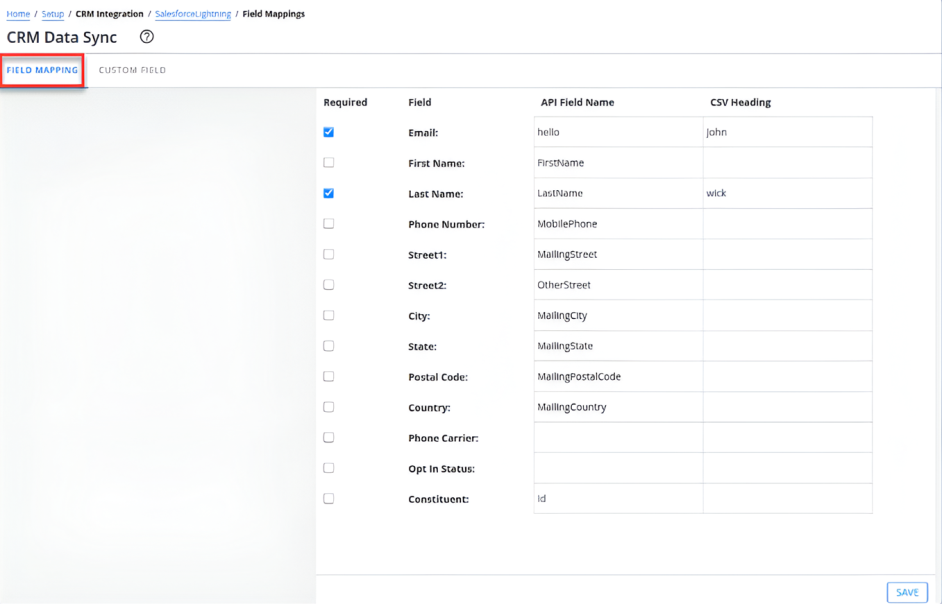
Review the field names to ensure that they are correct.
-
The Field column contains the mCommons field name.
-
The API Field Name column contains the API field name in Salesforce Lightning.
-
The CSV Heading column contains the heading in the CSV export file.
To limit the sync to records that contain data in specific fields, select the Required? checkbox next to the field name. When a field is required, it must contain a value in order to be synced. Empty fields are not synced.
Caution: Do not select Required for Phone number, Email, or Opt-in status fields, which must by default exist in both databases in order to sync data. Use caution if you change the field name for any of these three fields; if the custom field name is incorrect, the data sync will fail.
Caution: Do not select Required for Constituent as this ID is provided by Salesforce Lightning. If it is set to Required, mCommons profiles will not have this ID, causing the sync from mCommons to Salesforce Lightning to fail.
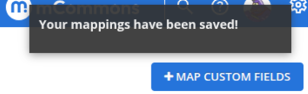
Once you have made changes in either tab, click the SAVE button at the bottom-right corner of the page to apply your updates. This will save all changes across both standard and custom field mappings. A flash message will appear confirming the mappings have been saved.
Custom Field:
You can now map custom fields between Salesforce Lightning and mCommons to keep your data in sync more effectively.
After setting up the Salesforce Lightning sync, it can take up to a day for all custom fields from Salesforce Lightning to appear in the dropdown list. You can create custom field mappings between Salesforce Lightning and mCommons only after these fields are visible in the dropdown.
You can choose from available custom fields in mCommons to set up the sync.
When you open the CUSTOM FIELD tab, you will see a table with the following columns:
-
Required: A checkbox to mark a field as required. When checked, this indicates that the field must be included during data sync with Salesforce Lightning.
-
Field: Displays the name of the custom field.
-
API Field Name: Shows the API name used for mapping the field to Salesforce Lightning.
-
CSV Heading: Indicates the column header in your uploaded CSV file that corresponds to this custom field.The CSV header is required when the CSV and API field headers are different.
-
Delete Icon: A Delete icon that lets you remove a custom field mapping.

Deleting a Custom Field
A
 Delete icon appears at the end of each custom field row. To remove a custom field mapping, simply click the Delete icon. When you delete, a confirmation modal will appear with the title “Are you sure?”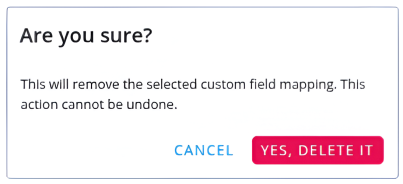
Select YES, DELETE IT to confirm the deletion and CANCEL to close the modal without making any changes. When you click YES, DELETE IT, the selected custom field row will be removed from the table.
Adding New Custom Fields
To add more flexibility, a + MAP CUSTOM FIELDS button is available in both the FIELD MAPPING and CUSTOM FIELD tabs. If you click this button from the FIELD MAPPING tab, you will be taken to the CUSTOM FIELD tab, and the Add Custom Field modal will open where you can add a new custom field.
The + MAP CUSTOM FIELDS button remains visible at the top and allows you to add new custom field mappings at any time. You can mark fields as required, map CSV headers to API fields, add new custom fields using the + MAP CUSTOM FIELDS button.
When you click the + MAP CUSTOM FIELDS button, whether from the Custom Fields tab or from the top-right corner of the Field Mappings page, a modal window titled “Add Custom Field” will appear.
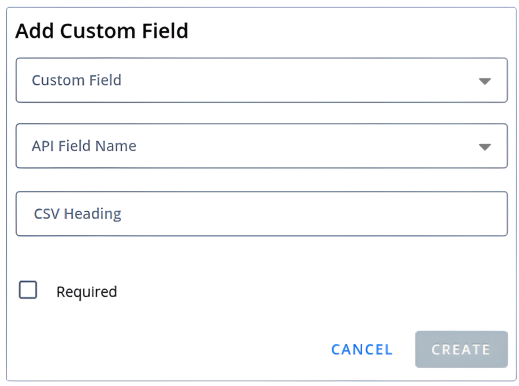
You can select from the list of available custom fields already created within your mCommons account. These are the fields you can map for your Salesforce Lightning CRM sync.
Note: Only one field can be selected at a time.
Once you choose a custom field from the dropdown, you will see additional input fields to complete the mapping:
-
Field: Displays the name of the custom field.
-
API Field Name: Shows the internal Salesforce Lightning API field name used for mapping.
-
CSV Heading: Displays the name of the column in your imported CSV file that maps to the custom field.
-
A Required checkbox (if the field must be populated during sync). A checkbox allows you to mark a custom field as required. Required fields must be included in the data during the integration process.
At the bottom of the modal, select CREATE to add the custom field to the custom field mappings table. This button will stay disabled until you select a valid field from the dropdown. Select CANCEL to close the modal without making any changes.
The Custom Field table displays all the custom fields you have added.

Note: When setting up custom field mappings for Salesforce Lightning, ensure that all required fields from your Salesforce Lightning CRM are included. mCommons lets you map custom fields, but it does not enforce the inclusion of all required Salesforce Lightning fields during a sync. If any required field is missing, the sync will fail and return a 400 error from Salesforce Lightning due to incomplete dat a.
Custom fields are synced bidirectionally between Salesforce Lightning and mCommons. Changes in one are automatically reflected in the other.
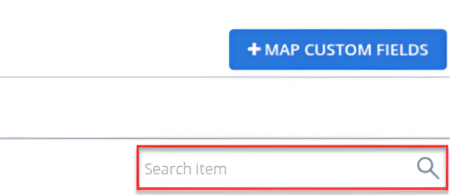
In the CUSTOM FIELD tab, you can also use the search field to find entries (Field and API Field Name) by entering a complete or partial term.
-
Activating the Salesforce Lightning sync
Before you begin, review the configuration settings for your sync:
-
Select
 Home in the left pane, and then select Data Sync.
The home page for your Salesforce Lightning sync opens.
-
In the Integration Actions panel on the right, select Configure Integration.

-
Review the configuration settings, making adjustments as needed.
-
When you are done, select Update.
-
To activate the integration sync, in the Integration Actions panel on the right, select Activate Integration.
The indicator in the upper-right corner is Active. The first data sync will run the following morning.
Data sync updates
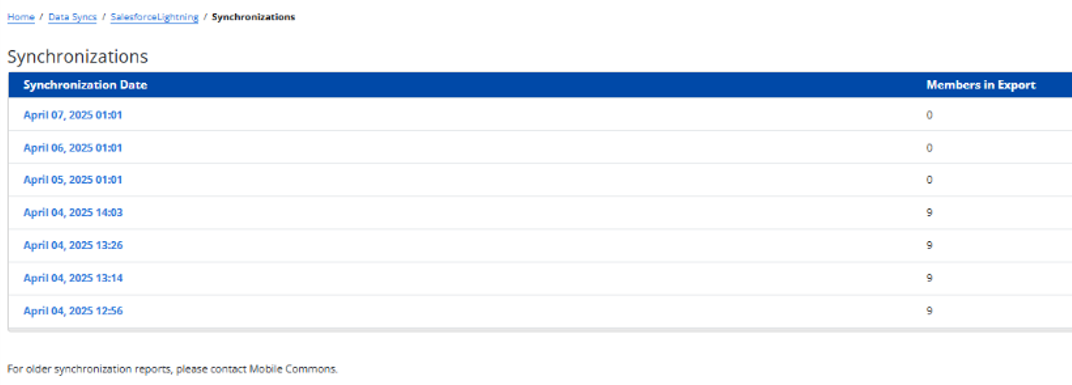
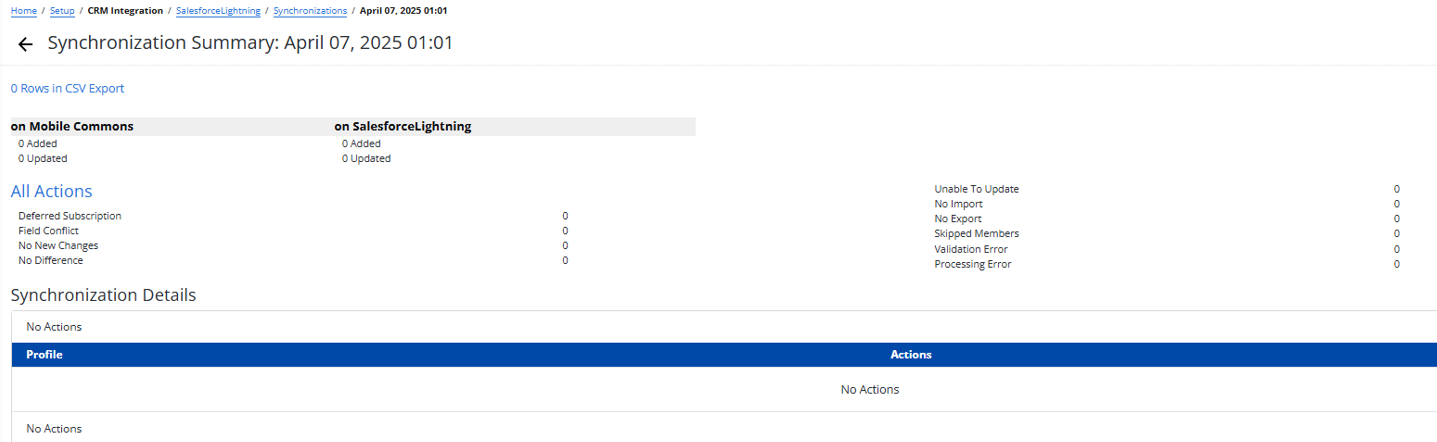
View a detailed synchronization report of each overnight sync, including the number of profiles synced and direct links to the corresponding profiles in mCommons. After activation, the mCommons data set and your Salesforce Lightning database are both updated on a regular basis:
-
mCommons checks for updates nightly, processing all recent updates from Salesforce Lightning during overnight hours.
-
Any new opt-ins or opt-outs from mCommons are synced to Salesforce Lightning every five minutes during the day.
-
For users whose profile records contain an email address, new opt-ins are added to Salesforce Lightning as a new record with an opt-in status of true.
-
For users with a matching record in Salesforce Lightning, new opt-outs update their opt-in status to false.
-
Note: Once user records are synced, the record number from the Salesforce Lightning system is added to the Constituent ID field in mCommons user profile and serves to identify records across both of your systems.
After your data sync runs, you can open the Synchronization report. For more information, see Working with the Synchronization report.
Deactivating the Salesforce Lightning sync
If you need to shut off the data sync with your Salesforce Lightning CRM system, whether temporarily or permanently, you can deactivate it. For more information, see Deactivating the integration.

Supported Salesforce Lightning Custom Field Types and Known Limitations
Supported Salesforce Lightning Custom Field Types
The following custom field types are currently supported for Salesforce Lightning:
-
Auto Number
-
Formula
-
Roll-Up Summary
-
Lookup Relationship
-
External Lookup Relationship
-
Checkbox
-
Currency
-
Date
-
Date/Time
-
Email
-
Geolocation
-
Number
-
Percent
-
Phone
-
Picklist
-
Picklist (Multi-Select)
-
Text
-
Text Area
-
Text Area (Long)
-
Text Area (Rich)
-
Text (Encrypted)
-
Time
-
URL
The following fields are not currently supported for syncing with Salesforce Lightning:
-
Formula
-
Roll-Up Summary
-
Lookup Relationship
-
External Lookup Relationship
-
Picklist
-
Picklist (Multi-Select)
Known Limitations
Number Field in Salesforce Lightning
-
In Salesforce Lightning, whole numbers (for example, 6) are stored as decimal values (6.0) and passed tomCommons in that format. When creating group filters in mCommons, this type or format difference may prevent a value of 6 from matching 6.0 exactly, which could result in variations in filter results.
Time Field Handling in Salesforce Lightning
-
Entering a value such as 03:57 in Salesforce’s Lightning Time field results in the output: "02:57:00.000Z". After mapping to mCommons, the stored value becomes 02:57, a one-hour difference from the original value. This may be related to time zone handling or conversion during data transfer.
Date/Time Field Handling
-
When mapping a Salesforce Lightning Date/Time field (for example, 2025-08-09T03:55:00) to mCommons, only the date portion is currently transferred/mapped. The time component is not captured in mCommons.
If you encounter any of the above issues, contact your mCommons support representative for possible workarounds. These known behaviors will be addressed in future releases and included in release notes once resolved.